In the realm of eLearning, SCORM (Sharable Content Object Reference Model) remains a staple for delivering platform-independent training courses. Many organizations still utilise SCORM to ensure compatibility across various learning management systems (LMS).
A common challenge these organisations face is how to quickly and affordably create SCORM courses from existing resources like PowerPoint presentations and PDF files.
While free tools are available, they often come with limitations such as inability to include quizzes or acknowledgements, or intrusive watermarks on the final product. Professional course authoring tools like Articulate and Captivate are an option and additionally offer robust design features. However they can be prohibitively expensive and require a significant learning investment.
For those with some technical know-how, manually creating a SCORM package is a viable alternative. This article demystifies the process of building a SCORM package from scratch.
What Makes Up a SCORM Package?
A SCORM package is comprised of several key components:
Schema Definition files: These files define the format of the SCORM manifest.
Manifest: The heart of the SCORM package, this XML file outlines the organization, resources, and metadata of the course. It can be used to introduce many features, but for the purposes of this article, we will stick with a basic single SCO and required resources.
Course Content: This includes all the HTML and JavaScript files that make up the actual learning content.
How I Manually Create a SCORM Package
Step 1: Start with a SCORM Content Packaging Example Project from SCORM Cloud
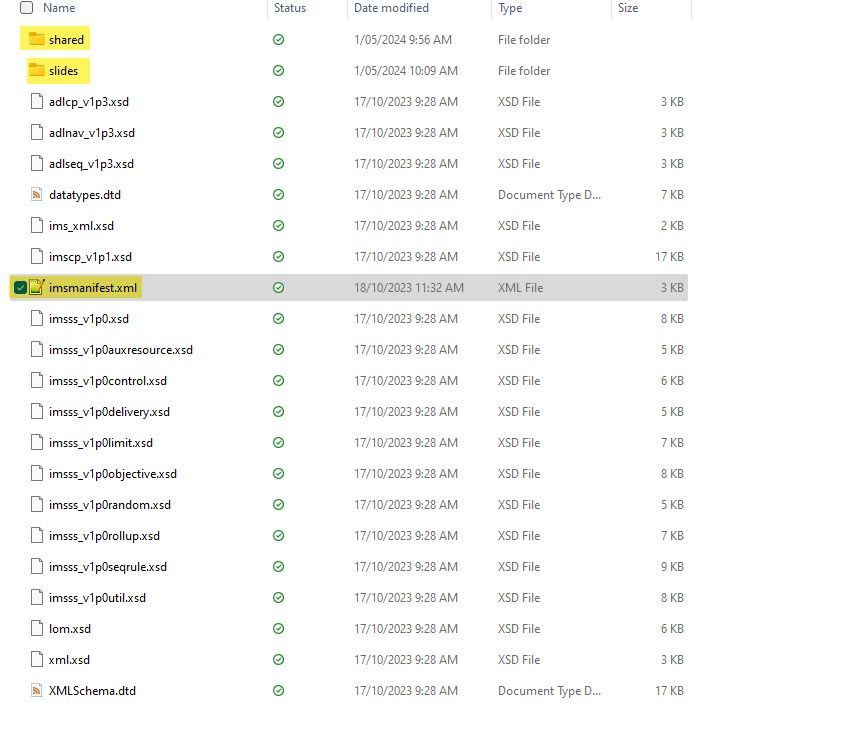
Begin by obtaining a SCORM Content Packaging Example project from SCORM Cloud or download a simplified version using the button above, based on the SCORM Cloud example, which provides all you need to create a SCORM package. After extracting the zip file, examine its contents. First up, we can disregard the descriptor (.xsd) files as they need no modifications but can remain in the project.
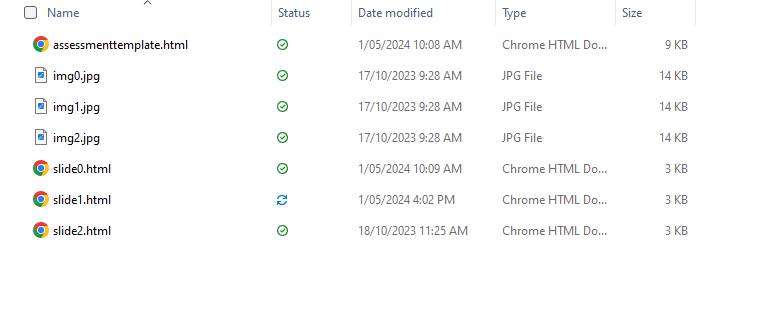
Let's focus on the "slides" and "shared" folders and the manifest.xml. The "shared" folder contains items that are shared throughout the course, like a logo, a global stylesheet, and any JavaScript libraries. It also houses the launchpage.html, which is the entry point of the course. The "slides" directory contains the course slides and associated image resources. The manifest describes the course assets.
A note here that you can structure your folders as you wish; just ensure to update the manifest and launchpage.html accordingly.
Step 2: Create Your Slides as HTML Files
Convert each slide of your existing presentation into an HTML file. If you are starting from a PowerPoint or PDF, you can find many free tools that will do this conversion for you.
If you have basic HTML and JavaScript coding skills, it's advantageous to create a basic HTML template for the slide content. This template can reference a global stylesheet and other resources like logos.
Here's an example of an HTML file that references the CSS file and logo in the shared folder:
Replicate this HTML template as needed for the number of slides in your course, and place them along with their resources into the "slides" folder.
Bonus: Create a Quiz (Optional)
If you wish to test knowledge, you can develop a quiz slide(s) using HTML forms and JavaScript. This can be as straightforward as multiple-choice questions or as complex as drag-and-drop matches, depending on your coding skills. Take a look at the included "assessmenttemplate.html" slide for an example.
Step 3: Update the Launch Page
Modify the /shared/launchpage.html file, the main entry point of the course. At the bottom of this file, there is an iframe used to display each slide. Below that are navigation buttons for moving to the next or previous slide. You can style these elements using CSS.
The JavaScript in the head section include initialisation of an Arraylist "pageArray" which contains the list of slides. Update this list to reference your slides, adjusting the path if you have a different file structure.
Step 4: Update the Manifest
The manifest file requires minimal updates. Modify the Title object to set the title of your course.
Ensure the resource object in the resources section points to the shared/launchpage.html file (or update to whichever html file is your entry point to the course). This is how the player knows which page to launch first.
Also, add your new slides and image resources to the resources section.
Step 5: Compress as a ZIP File
The final step is to compress the folder containing your course into a ZIP file. No special settings are needed, just zip all the contents. This ZIP file is what you will upload to an LMS as your SCORM course. It's a good idea to test your ZIP file using SCORM Cloud or your own LMS to ensure there are no errors.
Consider Professional Help
While the above steps provide a clear path to creating your own SCORM packages, the process can be time-consuming and does require a level of technical proficiency. If you prefer, our eLearning consultancy can handle the conversion process for you, starting from just AU$450 for a basic PowerPoint or PDF conversion. We also have options for enhancing your course including professional graphic design and voiceover, all at affordable prices. Get a free, instant quote.
Conclusion
Manually creating a SCORM package may seem daunting initially, but with some basic web development skills, it is entirely achievable. This method not only saves costs on expensive authoring tools but also gives you complete control over your course's design and functionality. By following these steps, you can transform any traditional educational resource into an interactive eLearning course, tailored exactly to your needs.
Created with
Login or sign up to start learningLogin to start learning